Patient
MedApp empowers you to efficiently manage patient records, ensuring seamless interactions and enhanced care. This guide will walk you through the process of adding patients, searching for records, and utilizing various features for optimal patient management.
Accessing the Patient Management Screen:
To begin managing patients (customers), follow these steps:
Login: Access your MedApp admin account using your credentials.
Navigate to the Front End: Proceed to the front end of the system which is essentially the domain name of the application.
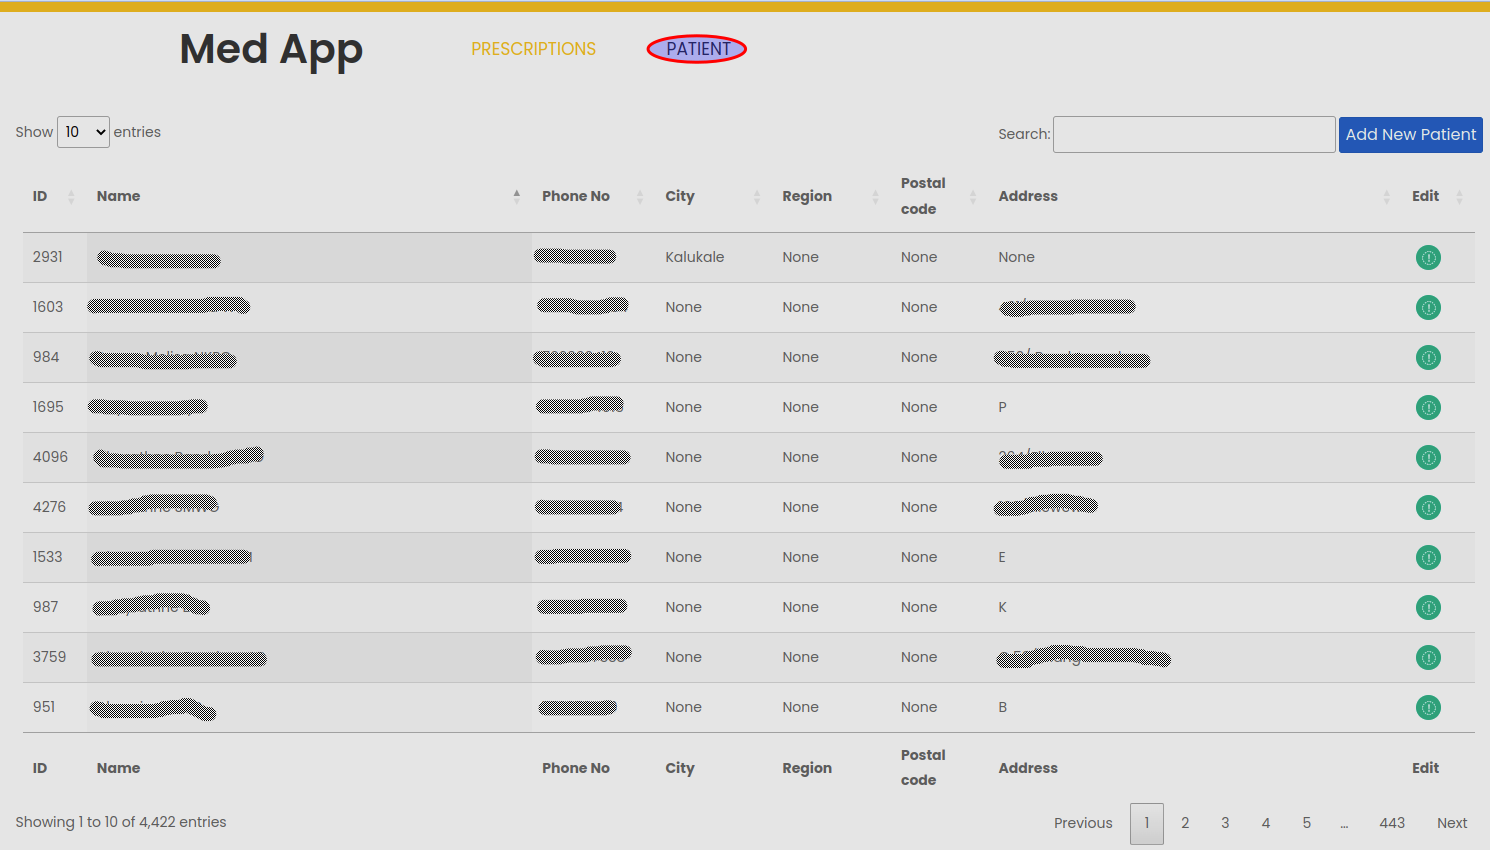
Click “Patient” Link: In the top menu, locate and click the “Patient” link. This action will take you to the Patient Management screen as bellow.

On the Patient Management screen, you’ll find a comprehensive list of all registered patients (customers). The list is organized in alphabetical order for easy reference.
Search Functionality: To quickly find specific patient records, use the search box located in the top left corner. Enter keywords related to the patient’s name, ID, or other attributes to refine your search.
Pagination: For viewing more patient records, navigate to the bottom of the list. Utilize the pagination controls to navigate through multiple pages of patient records.
Column Sorting: You have the ability to sort patient records based on different attributes. Click on the column name to order the records in ascending or descending order.
Add Patient
To register a new patient (customer), locate and click the “Add New Patient” button.

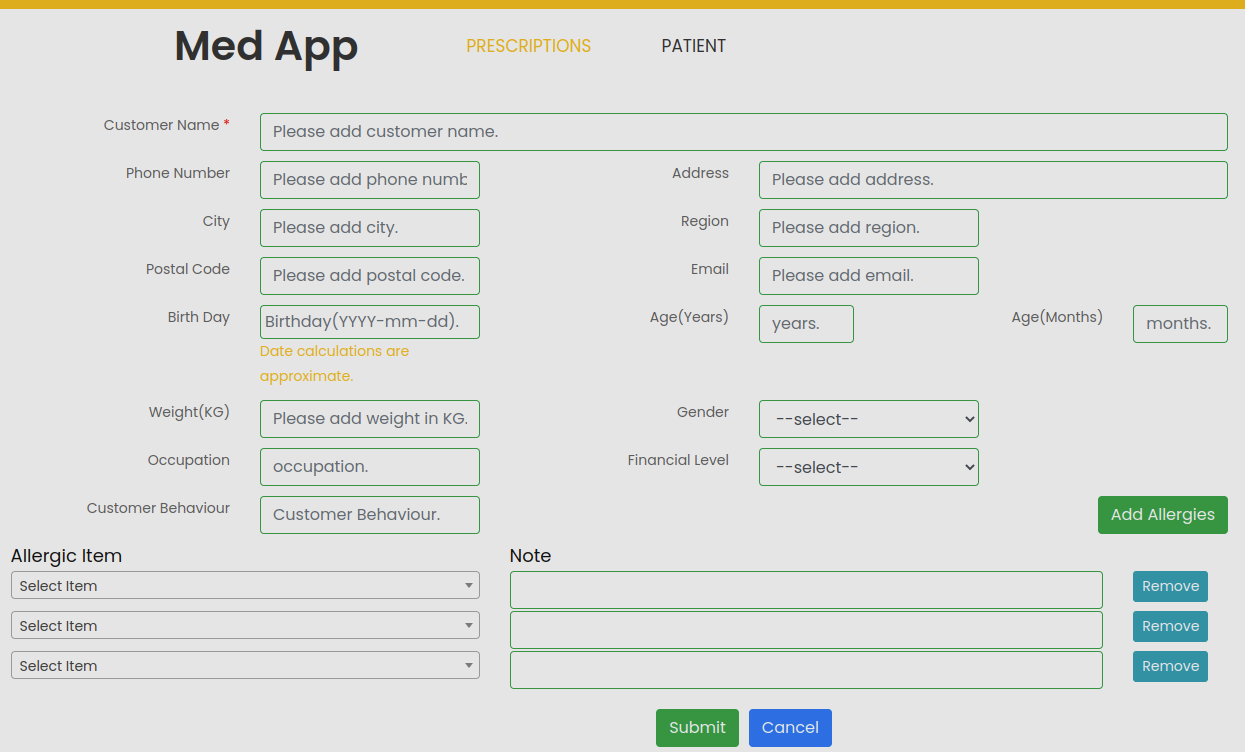
Provide Patient Details: On the Patient Add screen, fill in the necessary information, with Customer Name (also known as Patient Name) being a mandatory field. Other fields include Phone Number, Address, City, Email, Birthday, Age, Weight, Gender, Occupation, Financial Level, and Customer Behaviour, all of which are optional.
Automatic Date Calculations: If you input age and months, the system will generate the approximate birthday, and vice versa. Please ensure to carefully check all date calculations before saving the patient.
Customer Behaviour: This field is flexible, you can input any information, such as “angry” for an irate customer.
Phone Number for Notifications: Please note that the patient’s phone number is used for notifications. Ensure you input the correct phone number to facilitate effective communication.
Add Allergies
Allergies Section: If the patient has allergies, you can add multiple allergies by using the “Add Allergies” button.
Delete Patient
To initiate the process of deleting patients, follow these steps:
Login: Access your MedApp admin account using your credentials.
Navigate to the Admin Screen: Proceed to the admin section of the application.
Go to Customer Section: Within the admin panel, locate and navigate to the “Customer” section. This is where you can manage patient (customer) records.

Selecting Patients to Delete:
Choose Patients: In the Customer section, select the patient records you wish to delete. You can choose multiple patients by checking the corresponding checkboxes next to their names.
Performing the Deletion:
Action Menu: Once you’ve selected the desired patients, find the “Action” menu. It’s usually positioned near the top of the screen.
Select “Delete Selected Customers”: In the Action menu, choose the option labeled “Delete Selected Customers.”
Click “Go”: After selecting the deletion action, locate the “Go” button located next to the Action menu. Clicking this button will initiate the deletion process for the chosen patients.
Confirming the Deletion:
Confirmation Prompt: The system will prompt you to confirm the deletion. This is a vital step to prevent accidental deletions.
Confirm Deletion: If you are sure about the deletion, confirm your choice as prompted by the system.