Items
Add New Item
In MedApp, we understand the importance of efficient inventory management in your medical center. Our Item Management feature empowers you to easily add, categorize, and keep track of various items essential to your practice.
To begin managing items, follow these steps:
Login: Log in to your MedApp admin account.
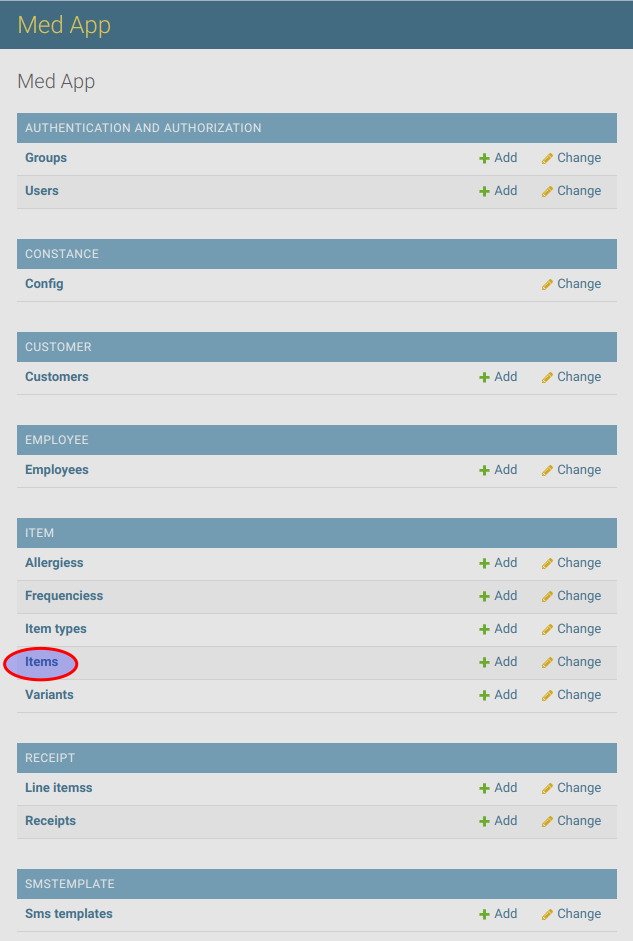
{your_domain}/admin/Navigate to the Admin Section: In the left-hand sidebar, locate the “Items” link and click on it. Alternatively, you can directly access the item admin screen by going to
{your_domain}/admin/item/item/.
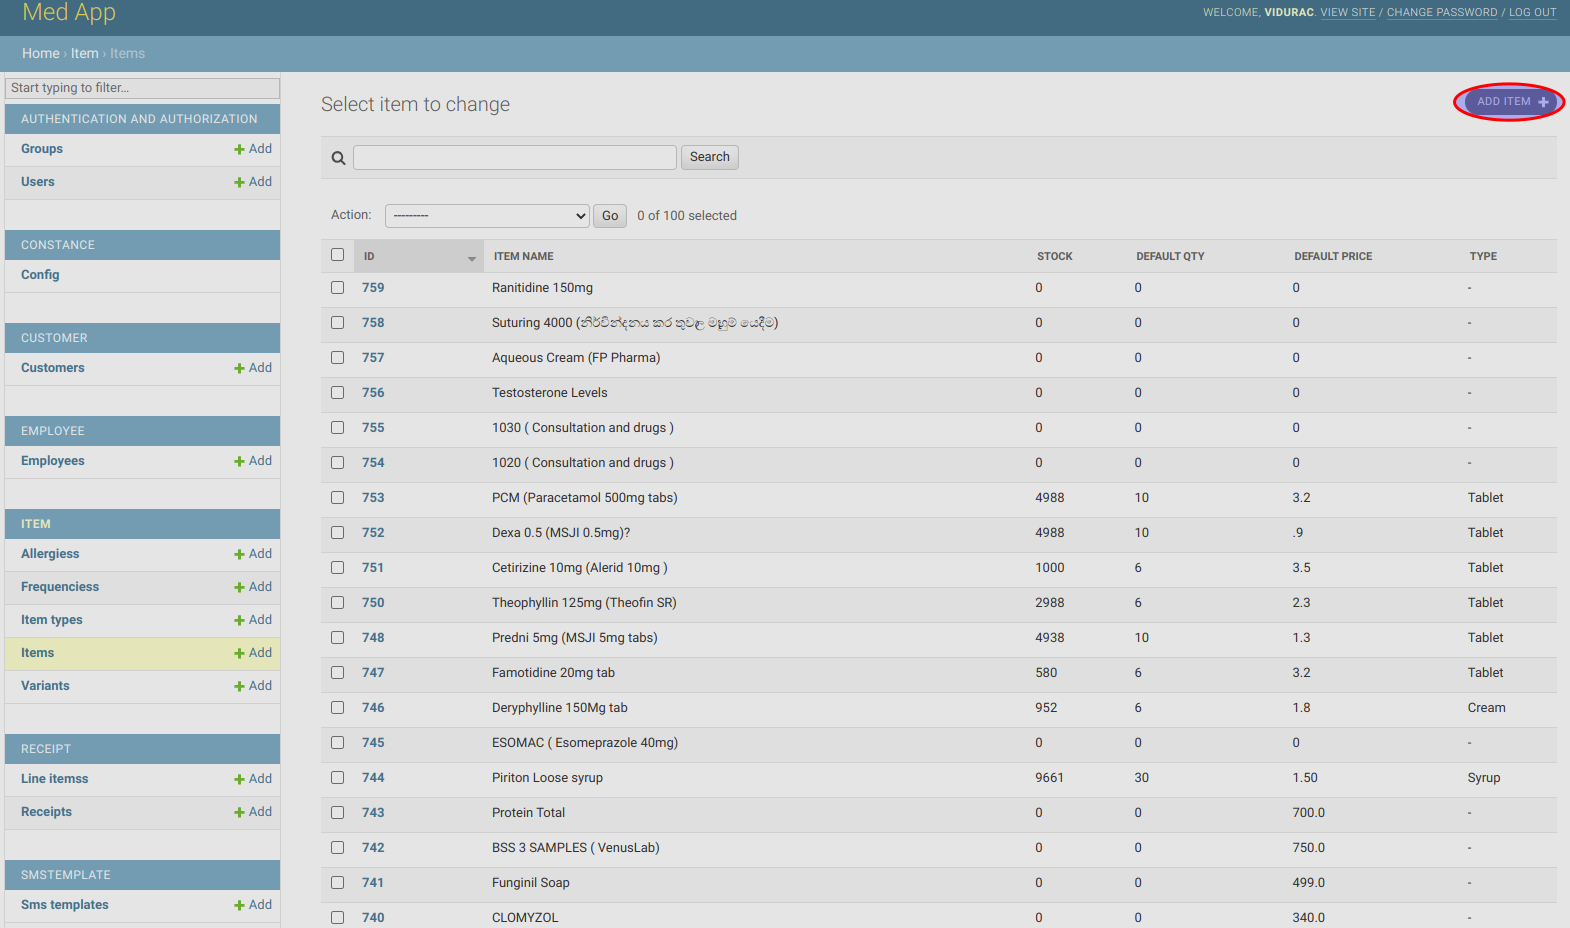
At the top right-hand corner of the Item admin screen, you’ll find the “Add Item” link. Click on this link to begin the process of adding a new item.
Once you click the “Add Item” link, you’ll see the bellow screen.
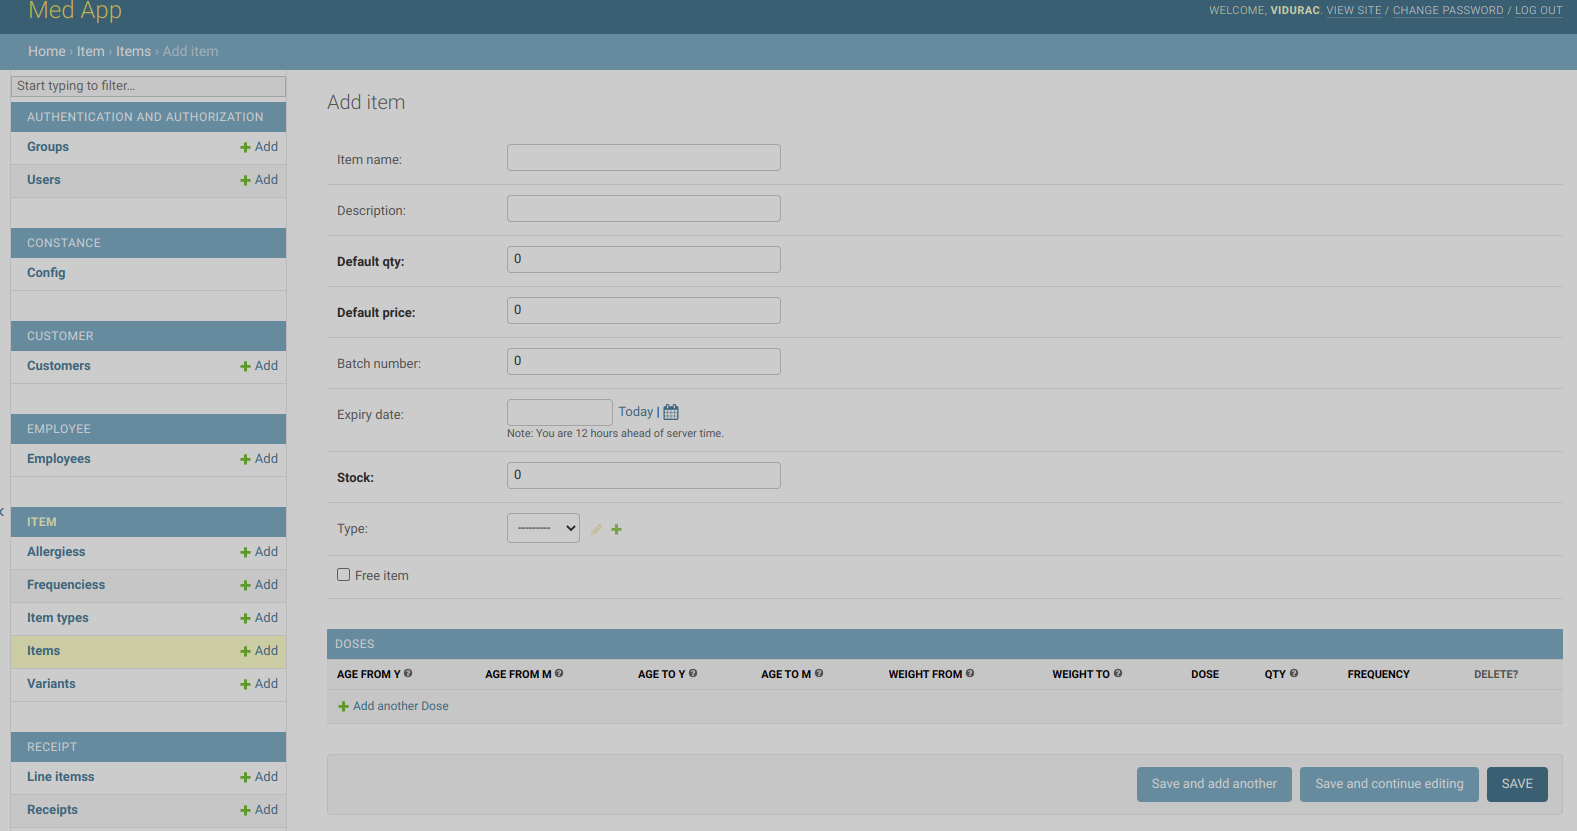
Provide Item Details: Fill in the requested details for the new item:
Item Name: Enter the name of the medicine.
Description: Describe the purpose and usage of the item.
Default Quantity: Input the default quantity that will automatically appear when you select the item in the prescription screen.
Default Price: Specify the default price, which will automatically display on the prescription screen when you select the item.
Expiry Date: Record the expiration date of the item.
Stock: Indicate the current stock in hand. The system will automatically deduct from this stock whenever you issue a prescription with this item.
Type: Define the type of the item.(If you want to add a new “type” not available in the drop down menu, please add a new record in the admin item types section)
Free Item: If the item is free for the patient, tick the checkbox. When marked as free, the price will not be included in the prescription total.
Doses
In the Dose Configuration tab of an item, you’ll find the “Add Another Dose” button. Click on this button to begin adding a new dose.
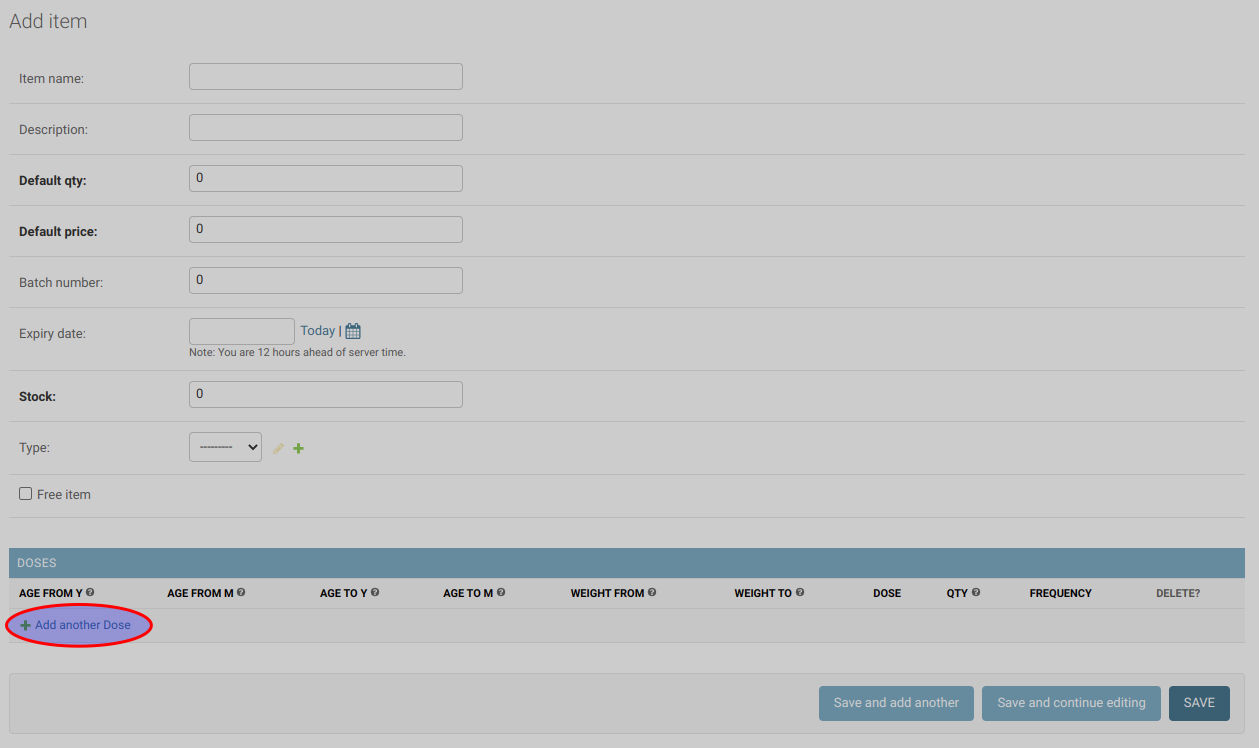
Specify Age and Weight Ranges: For each dose, provide the following information:
Age From (Y/M): Enter the lower age range, specifying both years and months.
Age To (Y/M): Enter the upper age range, specifying both years and months.
Weight From: Define the lower weight range.
Weight To: Define the upper weight range.
Dosing Details: Define the dosage and quantity for the specified age and weight range:
Dose: Specify the dosage of the medicine for the given age and weight range.
Quantity (Qty): Define the quantity of the medicine for the given age and weight range.
Frequency: Indicate how often the medication should be administered to the patient.
MedApp’s Dose Configuration feature streamlines the process of selecting appropriate medication dosages. Here’s how it works:
Dose Configuration: After defining age, weight, and dosage parameters for various patient groups, MedApp automatically matches patient information against these configurations.
Automatic Suggestion: When creating a prescription, MedApp’s system reviews the patient’s age and weight, and if within the defined ranges, automatically suggests a suitable dosage.
Doctor’s Responsibility: While the system’s automatic suggestion is designed to aid doctors in selecting accurate dosages, it remains the sole responsibility of the doctor to thoroughly review and confirm the suggested dose before finalizing the prescription.
Edit Item
Accessing the Item List Screen:
To begin editing items, follow these steps:
Login: Access your MedApp admin account using your credentials.
Navigate to the Admin Section: On the left-hand sidebar, locate and click the “Items” link. This link will redirect you to the Item List screen as in the bellow image.
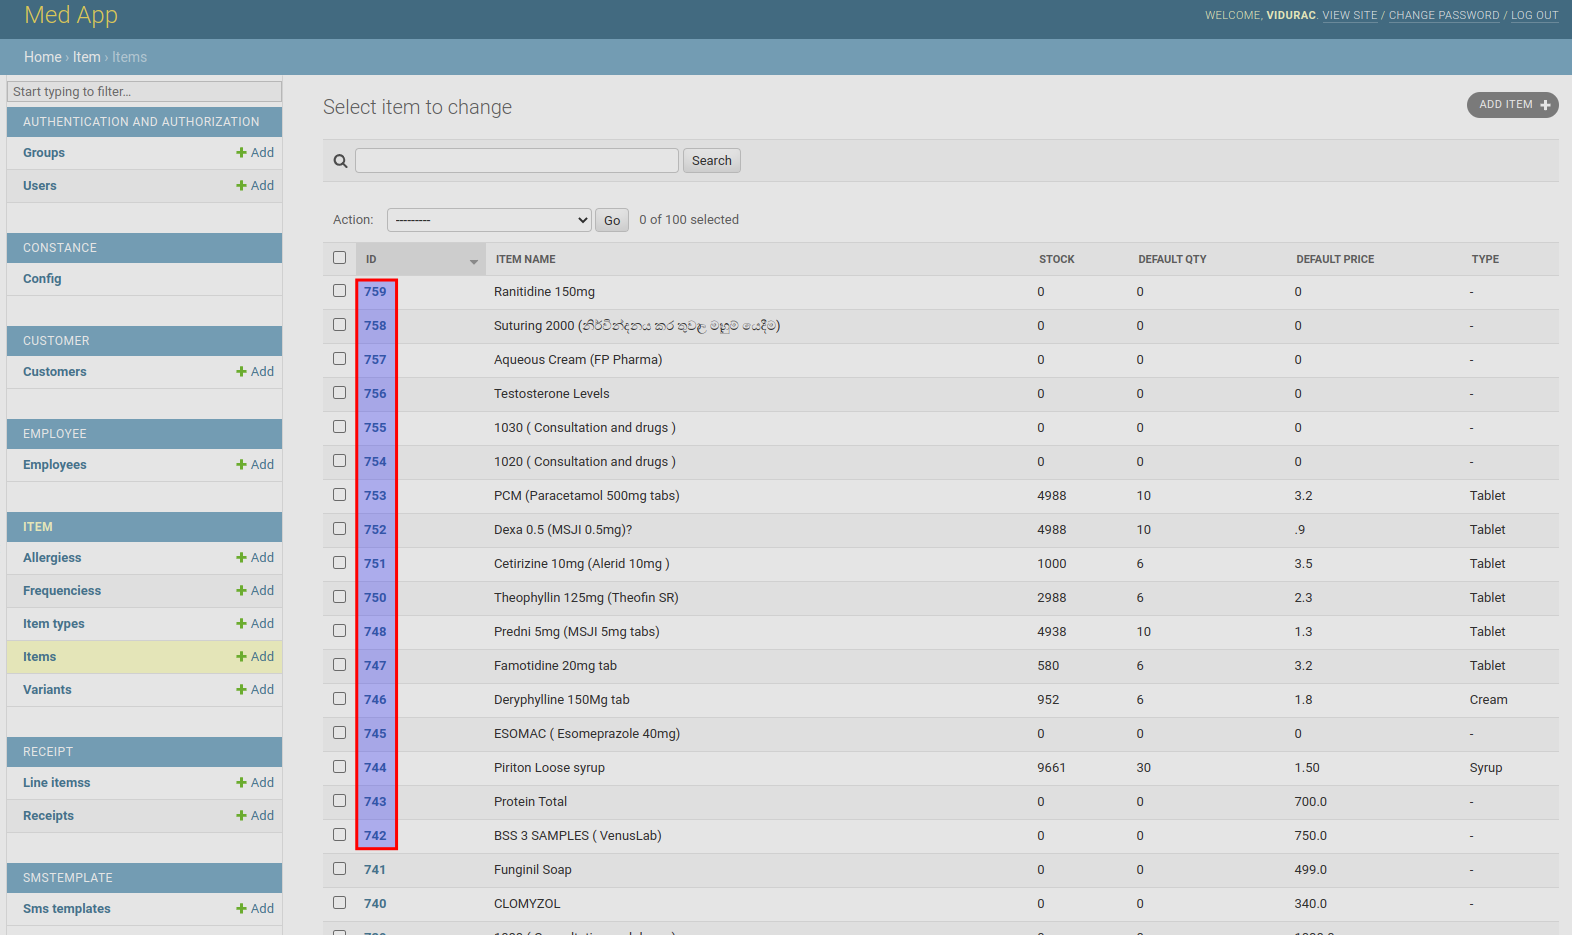
Locate the Item: On the Item List screen, you’ll see a table with various columns, including Item ID, Item Name, and other attributes.
Click the Item ID: As highlighted in the image, the Item ID is a link. Click on the Item ID of the specific item you wish to edit. Then the system will redirect you to the bellow screen.
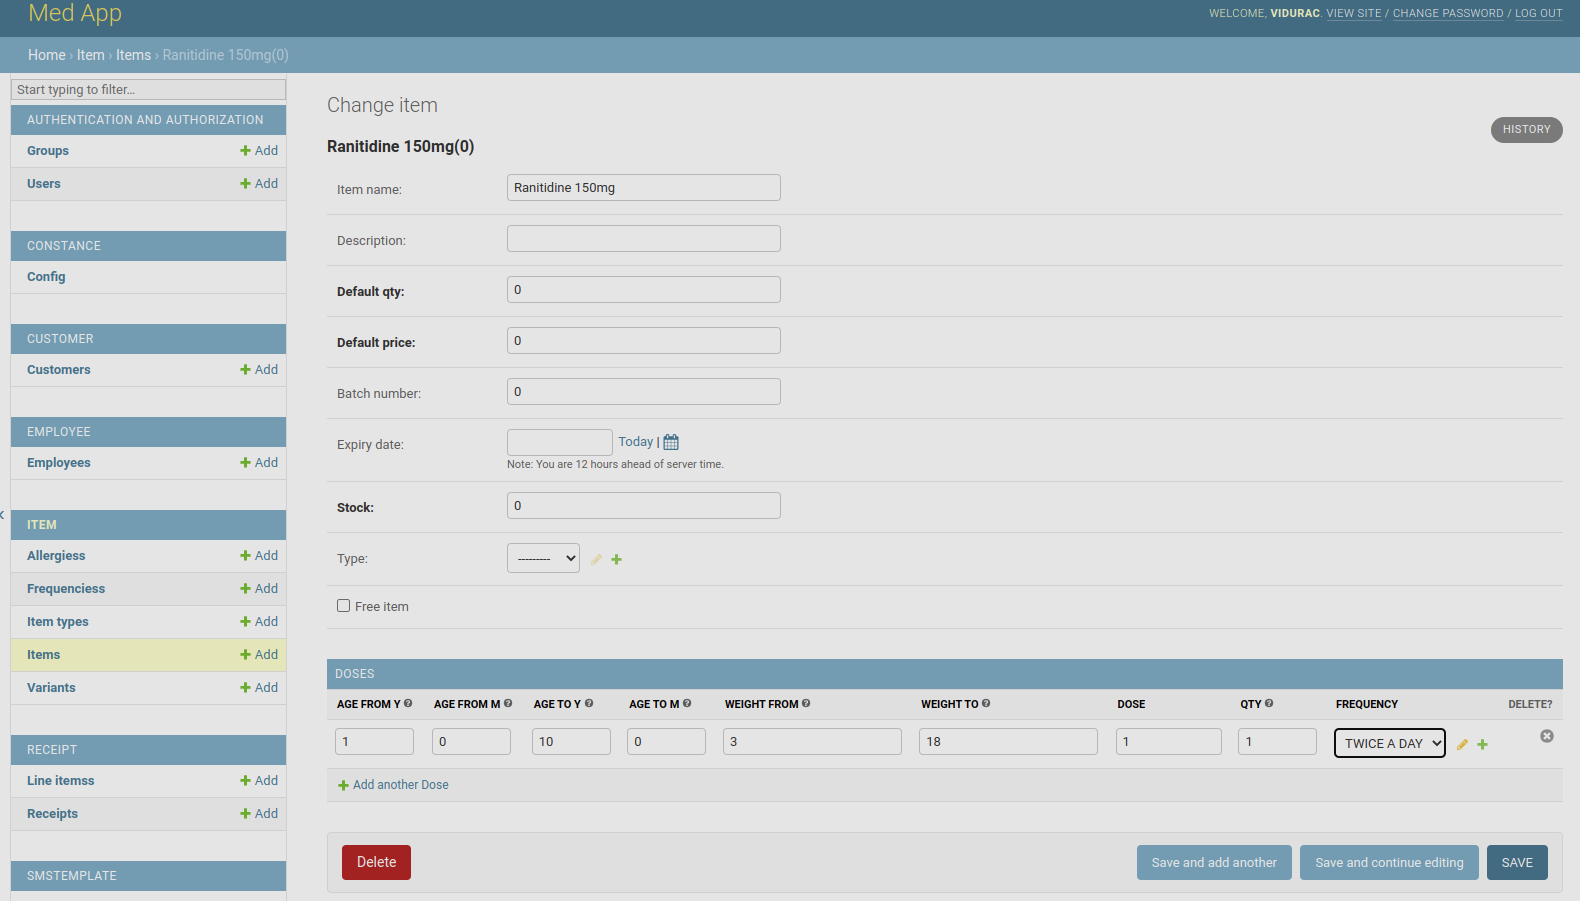
Modify Attributes: On the Item Edit screen, you can update the item’s attributes according to your requirements. Edit fields such as Item Name, Description, Default Quantity, Default Price, Expiry Date, Stock, Type, and more.
Managing Doses:
Update Doses: Within the Item Edit screen, you have the flexibility to update, add, or delete doses.
Adding Doses: Click the “Add Another Dose” button to include a new dose configuration. Fill in Age From, Age To, Weight From, Weight To, Dose, Quantity (Qty), and Frequency fields.
Updating Doses: For existing doses, modify the relevant fields as necessary.
Deleting Doses: If a dose configuration is no longer needed, you can remove it by clicking the corresponding delete option.
Save Changes:
Review and Verify: Before proceeding, thoroughly review all modifications, additions, or deletions to ensure accuracy.
Click Save: Once you’re satisfied with the changes made to the item’s attributes and dose configurations, click the “Save” button to finalize the updates.
Delete Item
Item Deletion: If an item is no longer needed, navigate to the bottom left-hand corner of the Item Edit screen. Locate the red color delete button and click it.